Blog

  • 15 Best Heat Damaged Hair Repair Products (Say Goodbye to Breakage!)

    15 Best Heat Damaged Hair Repair Products (Say Goodbye to Breakage!)

    Understanding Heat Damage: The First Step to Recovery

    Is your hair feeling more like straw than silk after too many hot tool styling sessions? Don’t panic—reviving your gorgeous, healthy strands is completely possible with the right heat damaged hair repair products. Let’s reclaim your hair’s natural bounce, shine, and strength with these expert-approved saviors.

    This article contains affiliate links. If you make a purchase through these links, we may earn a small commission at no extra cost to you.

    Before we can start slathering on the best masks and serums, we need to understand exactly what we are trying to fix. Heat damage isn’t just a superficial problem; it fundamentally alters the molecular structure of your strands. When you rely heavily on flat irons and curling wands, you are slowly breaking down the vital proteins that give your hair its elasticity.

    The good news is that the beauty industry has made incredible scientific advancements in recent years. By curating a targeted routine filled with high-quality heat damaged hair repair products, you can essentially reverse the clock. Let’s dive into the biology of your hair and figure out exactly what it needs to thrive.

    Signs Your Hair is Begging for Help

    How do you know if your hair is truly fried or just experiencing a temporary bout of winter dryness? There are several telltale signs that your hair is crying out for an intervention. Identifying these symptoms early is the key to preventing a drastic, unwanted haircut.

    • The Snap Test Fails: Healthy hair has a natural stretch to it. If you gently pull a wet strand and it snaps instantly without stretching, it lacks crucial moisture and protein.
    • Excessive Frizz and Flyaways: When cuticles are blown open by extreme heat, they refuse to lay flat. This creates a permanent frizzy halo that no amount of basic hairspray can tame.
    • Rough, Bumpy Texture: Run a single strand of hair between your fingers. If it feels smooth, you’re in the clear; if it feels jagged and coarse, you have severe cuticle damage.
    • Rapid Color Fading: High temperatures can literally boil the toner and dye right out of your hair. If your expensive salon color washes out in two weeks, heat is likely the culprit.
    • Tangles Easily: Damaged hair cuticles act like velcro, snagging onto each other constantly. If brushing your hair has become a painful chore, it’s time for a change.

    If you find yourself nodding along to more than one of these symptoms, don’t stress. Stocking up on the right heat damaged hair repair products will turn this situation around faster than you think.

    How Hot Tools Actually Affect Your Hair Cuticle

    To truly appreciate the magic of modern hair care, you need to know what happens when 400-degree plates clamp down on your hair. Your hair shaft is made up of a delicate inner core called the cortex, surrounded by a protective outer layer called the cuticle. Think of the cuticle like the overlapping shingles on a roof.

    When you apply extreme heat, the natural moisture trapped inside the cortex rapidly expands and turns into steam. This sudden burst of steam forces those protective cuticle “shingles” to blister, crack, and break off entirely. Once that protective barrier is compromised, your hair cannot hold onto hydration, no matter how much water you drink.

    This is why basic conditioners stop working when your hair is severely fried. You need specialized heat damaged hair repair products that are formulated to penetrate the shaft and rebuild those broken protein bonds from the inside out.

    The Best Heat Damaged Hair Repair Products for Wash Day

    Your shower routine sets the absolute foundation for your entire hair aesthetic. If you are using the wrong cleansers, you are sabotaging your recovery before you even step out of the bathroom. Using the right heat damaged hair repair products during wash day is non-negotiable.

    Restorative Shampoos That Won’t Strip Moisture

    The biggest mistake you can make with fragile hair is using harsh, clarifying shampoos too frequently. While a clean scalp is important, sulfates can strip away the natural, protective oils that your damaged hair desperately needs. You need a cleanser that removes product buildup gently.

    Look for sulfate-free formulas packed with amino acids, gentle surfactants, and hydrating oils. These luxurious shampoos will cleanse your scalp thoroughly while prepping your lengths to absorb the heavy-hitting heat damaged hair repair products that follow.

    Additionally, always remember to wash your hair with lukewarm water rather than scalding hot water. Hot water further lifts the hair cuticle, allowing precious moisture to escape down the drain.

    Deep Conditioning Masks for Intense Hydration

    Your standard three-minute daily conditioner simply won’t cut it when you are battling severe thermal breakage. You need an intensive deep conditioning treatment that penetrates past the damaged cuticle layer. This is where bond-building technology becomes your absolute best friend.

    To truly resurrect your hair, you need treatments that work on a molecular level to restore strength, elasticity, and shine. These high-tech formulas seek out broken disulfide bonds and link them back together, essentially rebuilding the skeleton of your hair.

    Our Top Pick for Bond Repair:

    When it comes to legendary heat damaged hair repair products, the Olaplex Hair Perfector No 3 Repairing Treatment is the undisputed champion of the beauty world. Available on Amazon for $30, this revolutionary pre-shampoo treatment boasts a stellar 4.6★ rating from over a hundred thousand beauty lovers.

    It’s not just a surface-level conditioner; it actively relinks broken disulfide bonds caused by thermal, chemical, and mechanical damage. Use this miraculous treatment on damp hair once a week before shampooing, and you’ll see a dramatic reduction in breakage and an incredible boost in natural shine.

    Unbeatable Split End Repair Treatments

    Split ends are the ultimate enemy of long, luxurious, Pinterest-worthy hair. Once a hair strand splits at the bottom, that tear can travel all the way up the hair shaft like a broken zipper. While you can’t permanently glue a fully split hair back together forever, advanced split end repair treatments can temporarily seal the damage.

    Serums That Actually Seal the Hair Shaft

    The beauty market is flooded with basic serums, but you need formulas that offer more than just a temporary silicone coating. Look for cutting-edge ingredients like biomimetic peptides, liquid keratin, and marine collagen. These ingredients actually mimic your hair’s natural structure.

    These advanced split end repair treatments act like a liquid bandage for your frayed, stressed-out ends. They smooth the cuticle down so flawlessly that your hair looks freshly trimmed, giving you that sleek, expensive “glass hair” aesthetic.

    Applying these serums to your damp ends before styling creates a protective barrier. This ensures that your hot tools glide smoothly over the hair without catching on jagged, broken cuticles.

    Preventative Trims vs. Split End Menders

    Let’s be completely real: getting a micro-trim every 8 to 12 weeks is essential for long-term hair health. However, incorporating high-quality split end repair treatments into your routine can significantly stretch the time between those salon visits.

    By using these targeted treatments consistently, you protect the fragile, older tips of your hair from daily friction against your clothes and pillowcases. This means you get to keep your hard-earned length while still looking polished and put-together.

    Our Top Pick for Reversing Damage:

    If you want a highly futuristic approach to split end repair treatments, the K18 Leave-In Molecular Repair Hair Mask is absolutely worth every penny of its $75 price tag. This viral Amazon find holds a solid 4.3★ rating because it is clinically proven to reverse hair damage in just 4 minutes.

    The patented K18Peptide is engineered to travel deeper into the inner layers of hair than traditional products, seamlessly reconnecting broken keratin chains. It’s an absolute game-changer for anyone trying to bounce back from aggressive bleaching and relentless hot tool styling, leaving your ends feeling brand new.

    Top Leave In Conditioner Dry Hair Solutions

    If you are dealing with thermal damage, stepping out of the shower without applying a protective moisture layer is a cardinal sin. Finding the perfect leave in conditioner dry hair solution is crucial for maintaining slip, detangling safely, and locking in hydration all day long.

    Lightweight Formulas for Fine Hair

    Fine hair can become easily weighed down by heavy creams, making it look greasy and flat rather than glossy and voluminous. If you have thin strands, you should always opt for a spray-based leave in conditioner dry hair formula.

    These milky, weightless mists provide essential detangling properties without sacrificing your hair’s natural body. They form an invisible, weightless shield against environmental stressors, UV rays, and future heat styling sessions.

    Simply mist the product from your mid-lengths to your ends and use a wide-tooth comb to gently distribute it. This ensures every single strand gets coated without suffocating your roots.

    Rich Creams for Thick, Coarse Textures

    Curly, thick, and coarse hair types naturally crave significantly more moisture than fine hair. For these gorgeous textures, a rich, buttery leave in conditioner dry hair treatment is exactly what the hair doctor ordered.

    You want to look for deeply nourishing ingredients like raw shea butter, Jamaican black castor oil, and pure aloe vera juice. The right cream will melt instantly into your high-porosity hair, leaving it incredibly touchable, defined, and frizz-free.

    When applying thick creams, use the “praying hands” method to smooth the product over your wet hair. This encourages the cuticle to lay flat and traps the water inside the hair shaft where it belongs.

    Our Top Pick for Deep Moisture:

    For an ultra-nourishing leave in conditioner dry hair savior, we are completely obsessed with the SheaMoisture Leave In Conditioner for Over-Processed, Damaged Hair. Retailing on Amazon for just $13.50 with a massive 4.6★ rating, it’s an incredible budget-friendly staple that delivers salon-quality results.

    Infused with reparative Jamaican Black Castor Oil, peppermint, and certified organic shea butter, this rich cream effortlessly detangles while promoting healthy elasticity. It’s the perfect daily treatment for reviving over-processed curls, smoothing frayed straight styles, and sealing in long-lasting hydration.

    The Magic of Rosemary Oil Hair Growth Elixirs

    You simply cannot talk about trendy hair recovery without mentioning the massive viral sensation of scalp oiling. Incorporating rosemary oil hair growth treatments into your weekly routine is the ultimate secret to achieving thicker, longer, and more resilient hair.

    Why Rosemary Oil is a Scalp Care Game-Changer

    Scientific studies have shown that rosemary oil can be just as effective as traditional over-the-counter treatments for promoting hair density. It works primarily by stimulating intense blood circulation in the scalp, which delivers vital oxygen and nutrients directly to your hair follicles.

    Beyond just speeding up growth, a high-quality rosemary oil hair growth blend helps soothe an itchy, flaky, and dry scalp. It’s a holistic, natural approach that ensures your new hair grows in strong enough to withstand future styling damage.

    Furthermore, rosemary oil is known for its antioxidant properties, which help protect the scalp from free radical damage. A healthy scalp environment is the literal foundation for a head of healthy, glossy hair.

    How to Properly Apply Oils for Maximum Growth

    To get the absolute most out of your rosemary oil hair growth routine, proper application technique is everything. Start by sectioning your dry hair and applying the oil directly to your scalp using a dropper.

    Once applied, spend at least five minutes massaging the oil into your scalp with your fingertips or a silicone scalp massager. This physical stimulation combined with the oil’s properties creates the perfect environment for rapid hair growth.

    Leave the oil on for a few hours before your wash day to let the magic happen. Consistency is everything here; make this a non-negotiable weekly ritual, and you will see baby hairs sprouting in no time.

    Our Top Pick for Scalp Stimulation:

    The undisputed queen of scalp oils right now is the Mielle Organics Rosemary Mint Scalp & Hair Strengthening Oil. At an unbeatable $9.99 on Amazon with a glowing 4.6★ rating, this potent little bottle is an absolute must-have for your beauty cabinet.

    Formulated with biotin and an invigorating blend of over 30 essential oils, this tingling treatment nourishes split ends and encourages robust hair growth. It’s incredibly versatile—lightweight enough for daily use on your ends to smooth flyaways, or perfect as an intensive pre-wash scalp treatment.

    Building Your Ultimate Heat Recovery Routine

    Having a bathroom cabinet full of the best heat damaged hair repair products is totally useless if you don’t use them correctly. Creating a structured, consistent routine will guarantee your hair gets round-the-clock protection and nourishment.

    Repairing hair takes time, patience, and a commitment to better habits. Let’s break down exactly how you should
  • 12 High Quality Press On Nails for Flawless Hands (#9 is Stunning)

    12 High Quality Press On Nails for Flawless Hands (#9 is Stunning)

    Say goodbye to expensive, time-consuming salon visits and hello to a flawless DIY manicure! If you’re tired of flimsy falsies that pop off in a day, it’s time to upgrade your routine with high quality press on nails. Let’s dive into the trendiest designs and the ultimate application secrets to making your luxury press-ons last for weeks.

    This article contains affiliate links. If you make a purchase through these links, we may earn a small commission at no extra cost to you.

    Whether you are a busy professional, a stay-at-home mom, or simply someone who loves switching up their aesthetic, high quality press on nails are a total game-changer. You no longer have to sacrifice hours of your weekend sitting in a salon chair just to get the perfect set. Today’s press-ons are thicker, more durable, and completely customizable to fit your unique style.

    In this comprehensive guide, we will walk you through everything you need to know about achieving a flawless at-home manicure. From selecting the most stunning sets to mastering the art of application, you will soon become a DIY nail pro.

    Why High Quality Press On Nails Are the Ultimate Beauty Hack

    If you haven’t tried high quality press on nails recently, you are missing out on a massive beauty revolution. The days of cheap, plastic-looking drugstore nails that bend at the slightest pressure are long gone. Modern press-ons are crafted from durable gel and acrylic materials that look and feel completely natural.

    The Cost-Effective Salon Alternative

    Let’s be real: maintaining a bi-weekly acrylic or gel extension habit can seriously drain your bank account. Between the base price, the intricate nail art fees, and the tip, a single salon trip can easily cost upwards of $100. High quality press on nails offer that exact same luxury look for a fraction of the price.

    For around $15 to $30, you can score a stunning, hand-painted set that looks identical to a high-end salon manicure. Plus, since many high quality press on nails are reusable, your cost-per-wear drops down to practically pennies. It is the smartest way to keep your hands looking flawless on a budget.

    Preventing Damage to Your Natural Nails

    We all know the dreaded feeling of paper-thin, sensitive natural nails after removing a set of harsh salon acrylics. The aggressive filing, heavy chemical use, and electric drilling can take a serious toll on your nail health over time. Switching to high quality press on nails is a fantastic way to give your natural nail beds a much-needed break.

    When applied and removed correctly, press-ons cause zero damage to your natural nails. You get all the length, strength, and glamour of enhancements without the long-term destructive side effects. It is the perfect protective style for your hands!

    Endless Trendy Press On Nail Designs

    One of the best parts about doing your own manicures is the sheer variety of trendy press on nail designs available at your fingertips. At a salon, you are limited to the skill level of your specific nail tech. With press-ons, the entire internet is your nail artist.

    You can effortlessly switch from a sophisticated, short French tip for a Monday morning meeting to a dramatic, gemstone-encrusted stiletto set for a weekend girls’ trip. High quality press on nails allow you to change your aesthetic as often as you change your outfit.

    Top High Quality Press On Nails to Try This Year

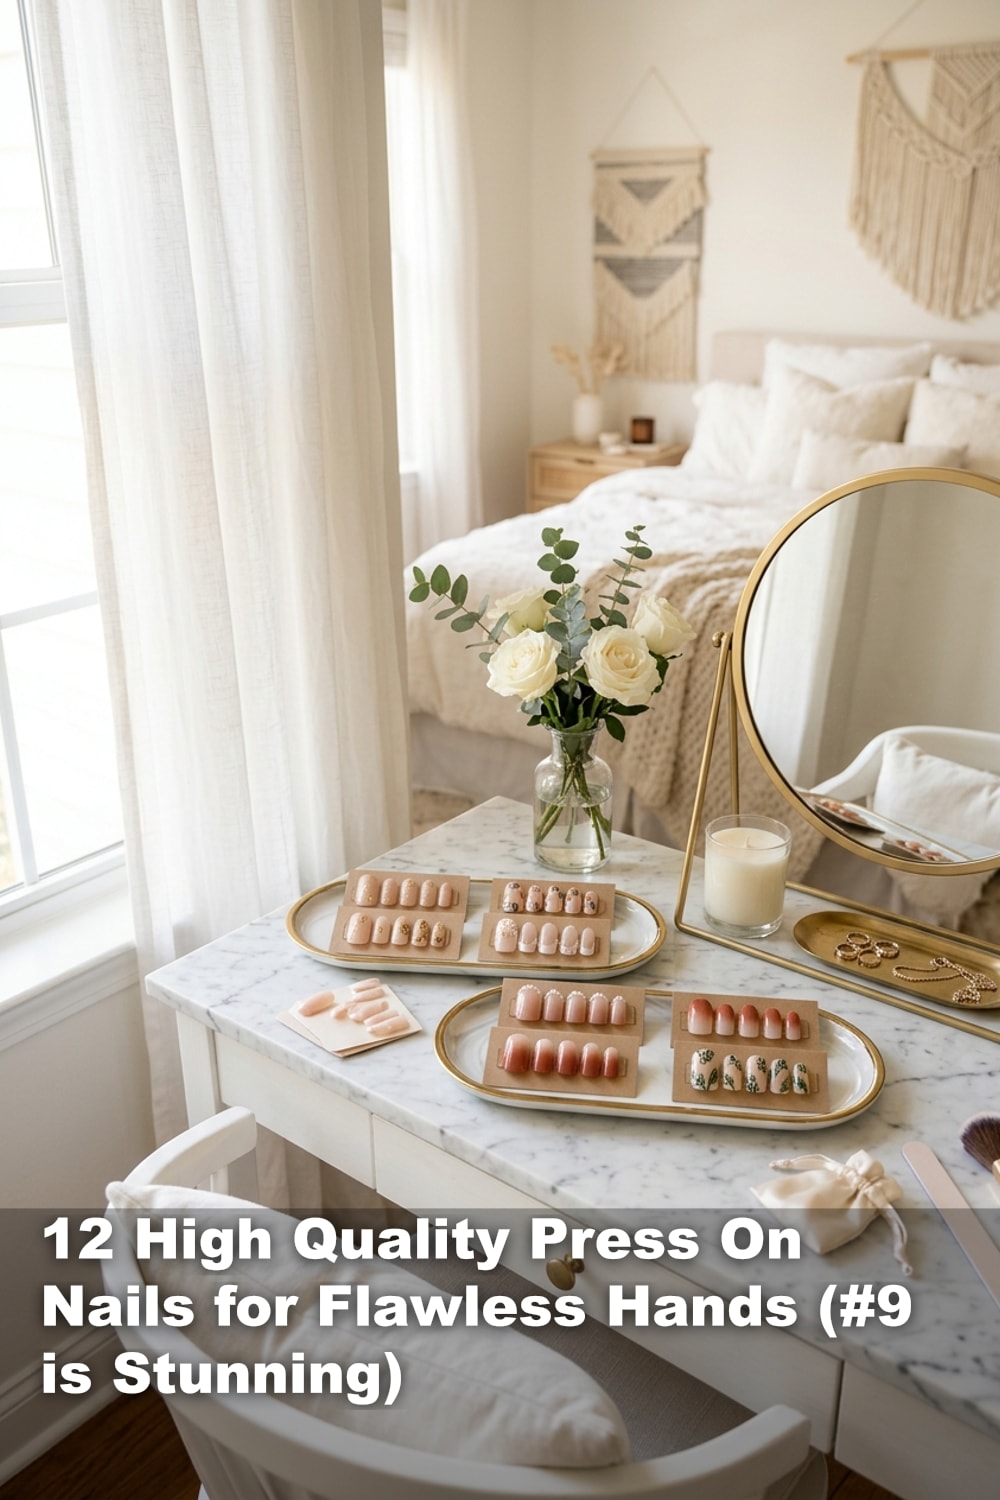
    Ready to build your ultimate DIY nail wardrobe? We have curated a list of 12 must-have high quality press on nails that will elevate your look instantly. From subtle and sweet to absolutely jaw-dropping, here are the top sets to add to your collection.

    Best for Everyday Minimalist Looks

    Sometimes, less is definitely more. These first four sets are perfect for achieving that “clean girl aesthetic” that is dominating Pinterest and TikTok right now.

    1. The Milky White Almond: A soft, semi-sheer white that looks incredibly chic and elongates the fingers.
    2. The Micro French Squoval: A modern twist on the classic French manicure, featuring a super thin white line on a natural nude base.
    3. The Blush Pink Shorties: Perfect for typing and texting, this high quality press on nails set mimics the look of a healthy, glowing natural nail.
    4. The Sheer Lip-Gloss Nail: A high-shine, translucent pink that gives your hands a perfectly manicured, glossy finish.

    Best for Bold, Trendy Press On Nail Designs

    When you want your hands to be the center of attention, these bold and trendy press on nail designs are guaranteed to turn heads. They are fun, expressive, and totally unique.

    1. The Neon Abstract Swirl: Vibrant pops of neon green and pink swirling over a nude base for a retro, Y2K vibe.
    2. The Matte Black Coffin: Edgy, sleek, and fiercely dramatic. The matte finish adds a sophisticated touch to a dark, moody look.
    3. The Chrome Starburst: Silver metallic stars painted over a jet-black background, perfect for concert season or a night out.
    4. The Tortoiseshell Stiletto: A rich, warm amber and brown pattern that looks incredibly expensive and fashion-forward.

    Best Luxury Custom and Reusable Sets

    For those special occasions where only the best will do, these luxury sets are the ultimate investment. Prepare to be amazed, because number 9 is an absolute showstopper!

    1. The Hand-Painted Crystal Ombre (Stunning!): This is the holy grail of high quality press on nails. Featuring a flawless nude-to-white ombre fade, this set is heavily encrusted with genuine, light-catching crystals carefully placed by hand. It looks like a $200 custom bridal set and guarantees endless compliments!
    2. The Velvet Magnetic Cat Eye: A mesmerizing, multi-dimensional polish that shifts in the light, creating a plush, velvet-like illusion on the nail.
    3. The 3D Sculpted Floral: Delicate, raised acrylic flowers and tiny pearl accents make this set a true work of wearable art.
    4. The Custom Sized Aura Set: Airbrushed bursts of color that perfectly match your energy, custom-measured to fit your exact nail bed dimensions.

    To ensure these gorgeous sets stay locked in place for weeks, you need an adhesive you can trust. We highly recommend grabbing the NYK1 Nail Bond Super Strong Nail Glue from Amazon. This brush-on formula acts like cement for your falsies, preventing any embarrassing pop-offs while you go about your day. It is an absolute must-have for anyone serious about high quality press on nails!

    How to Prep Your Nails for Long Lasting Press On Nails

    The secret to achieving long lasting press on nails has very little to do with the nails themselves, and everything to do with your preparation. Skipping the prep steps is the number one reason why press-ons fail prematurely.

    Think of your natural nail as a canvas. If the canvas is oily, uneven, or covered in dead skin, the glue simply will not adhere. Follow these vital prep steps to guarantee a flawless, week-long hold.

    Pushing Back Cuticles Properly

    Your cuticles are the thin layer of dead skin that grows onto your nail plate. If you glue a press-on nail over this skin, it will lift within 24 hours as the skin naturally sheds. Start by applying a gentle cuticle remover and soaking your hands in warm water for a few minutes.

    Using a wooden orange stick or a stainless steel cuticle pusher, gently push the skin back towards the base of your finger. Carefully nip away any obvious, hanging hangnails, but be cautious not to cut living tissue. This creates a clean, elongated nail bed for your high quality press on nails to grip onto.

    Buffing and Dehydrating the Nail Bed

    Nail glue adheres best to a slightly textured, completely dry surface. Take a fine-grit buffer block and gently buff the surface of your natural nails. You only want to remove the natural shine—do not aggressively file or thin out your nail plate!

    Once buffed, take a lint-free wipe saturated with 90% isopropyl alcohol and scrub each nail thoroughly. This removes all dust, natural oils, and moisture from the nail bed. Dehydrating is the ultimate trick to make press on nails last significantly longer.

    Choosing the Perfect Size for Each Finger

    Sizing is crucial for both comfort and longevity. A high quality press on nail should fit perfectly from sidewall to sidewall without touching your skin or overlapping your cuticles. If a nail is too small, it will pinch your finger and eventually pop off due to the tension.

    If you are between sizes, always choose the slightly larger nail and gently file the sides down to fit your unique shape. Lay out all ten pre-sized nails in order before you even open your glue. Being organized makes the application process smooth and stress-free.

    During your prep routine, having a reliable adhesive ready to go is crucial. The NYK1 Nail Bond Super Strong Nail Glue features a precision brush applicator that makes it incredibly easy to control where the glue goes. It dries fast and holds strong, ensuring your beautifully prepped nails stay flawless for weeks.

    Application Secrets to Make Press On Nails Last

    Now that your natural nails are perfectly prepped, it is time for the main event. Applying high quality press on nails is an art form, but with a few insider secrets, you will master it in no time.

    If you want to make press on nails last through dishwashing, typing, and daily life, you need to rethink how you apply your adhesive. Forget the tiny, messy squeeze tubes of the past; it is all about technique.

    The Double-Glue Method Explained

    The double-glue method is the holy grail technique for long lasting press on nails. Instead of just putting a drop of glue on your natural nail, you are going to apply adhesive to both surfaces. This creates an unbreakable, interlocking bond.

    • Step 1: Brush a thin, even layer of glue over your entire natural nail bed, avoiding the cuticles.
    • Step 2: Brush a second thin layer of glue on the back of the high quality press on nail, specifically where it will touch your natural nail.
    • Step 3: Let the glue sit for about 3-5 seconds to become slightly tacky before applying.

    Angles Matter: The 45-Degree Application Rule

    Never just slap a press-on nail flat onto your finger. This traps tiny air bubbles underneath the plastic, which weakens the glue bond and can even lead to trapped moisture (which causes “green nail” bacteria). Instead, use the 45-degree angle rule.

    Line up the base of the press-on nail with your cuticle at a 45-degree angle. Slowly press the nail down, rocking it forward from the cuticle to the free edge. This motion pushes all the air bubbles out, ensuring a flush, secure fit. Hold it firmly in place for 30 seconds to let the glue set completely.

    Avoiding Water for the First 24 Hours

    This is the hardest rule to follow, but it is absolutely vital to make press on nails last. Even though your nail glue feels dry within seconds, it actually takes up to 24 hours to fully cure and harden. Exposure to water during this curing window will break down the adhesive.

    Try to apply your high quality press on nails right before bed. This gives the glue a solid 8 hours to cure while you sleep, completely uninterrupted by hand washing, showering, or doing the dishes. It is a simple habit change that doubles the lifespan of your manicure.

    To execute the double-glue method perfectly, you need a brush-on adhesive like the NYK1 Nail Bond Super Strong Nail Glue. Available on Amazon, this salon-grade glue spreads evenly without clumping, making it incredibly easy to coat both the false nail and your natural nail bed for maximum security.

    Trendy Press On Nail Designs Dominating This Season

    One of the main reasons we love high quality press on nails is the ability to wear intricate, viral nail art without paying premium salon prices. The nail art scene moves incredibly fast, but press-ons allow you to stay ahead of the curve effortlessly.

    If you are looking for inspiration for your next DIY mani day, look no further. Here are the trendy press on nail designs that are completely dominating social media this season.

    Glazed Donut and Chrome Finishes

    The “glazed donut” trend, popularized by Hailey Bieber, is still going incredibly strong. This look features a sheer, milky base topped with a pearlescent chrome powder that gives the nails a wet, glowing appearance.

    High quality press on nails have perfected the glazed look, offering it in various undertones like strawberry pink, chocolate brown, and icy white. Chrome finishes in bold silver and gold are also making a massive comeback for a futuristic, metallic vibe.

    French Illusion and Aura Nails

    Optical illusions are taking over the nail world. The French illusion trend uses clever ombre shading to create a 3D, glowing French tip that looks incredibly complex. It is a mesmerizing design that is very difficult to paint by hand, making press-ons the perfect shortcut.

    Aura nails are another massive trend, featuring a darker base with a bright, airbrushed circle of color radiating from the center. These trendy press on nail designs give off a mystical, ethereal vibe that is perfect for any season.

    3D Art and Gemstone Embellishments

    Flat nail art is out, and texture is in! High quality press on nails are now featuring incredible 3D elements like sculpted gel ribbons, raised water droplets, and chunky gemstone clusters. These tactile designs add a luxurious, editorial feel to your hands.

    Because these 3D elements are cured into the press-on during the manufacturing process, they are surprisingly secure. You get all the bling and texture without the worry of a gemstone snagging your hair or falling off during the day.

    When rocking these bold, heavily embellished styles, you want to be absolutely sure they don’t pop off at an inconvenient time. Grab a bottle of the NYK1 Nail Bond Super Strong Nail Glue to keep your 3D masterpieces firmly attached. Its extra-strong hold is perfect for supporting the slight extra weight of gemstone and chrome designs.

    How to Safely Remove and Reuse Your Press Ons

    The beauty of investing in high quality press on nails is that they are not a one-and-done product. Unlike cheap drugstore nails that crack when you take them off, luxury sets can be worn multiple times if removed correctly.

    Never, under any circumstances, rip or bite your press-on nails off! Forceful removal will tear off the top layers of your natural nail plate, leading to severe damage and thinning. Patience is the key to safe removal.

    The Warm Water, Soap, and Oil Soak

    To safely break down the nail glue without using harsh acetone (which would melt and ruin the reusable press-on), you need to create a gentle soaking bath. Fill a small bowl with warm water—as warm as you can comfortably stand.

    Add a generous squirt of liquid dish soap and a few tablespoons of olive oil or cuticle oil to the water. Soak your fingertips in this mixture for 15 to 20 minutes. The hot water softens the glue, while the soap and oil seep under the edges of the press-on to gently break the bond.

    Gently Buffing Away Leftover Glue

    After soaking, use a wooden cuticle stick to gently nudge the sides of the press-on nail. If it feels loose, carefully wiggle it off. If there is still resistance, soak for another 5 minutes. Never force it!

    Once the nails are off, you will likely have some dried glue residue left on your natural nail beds. Take a soft buffer block and very gently buff away the remaining glue, then apply a rich cuticle oil to rehydrate your hands.

    Storing Your Nails for Next Time

    To prep your high quality press on nails for their next wear, you need to clean out the dried glue from the back of the falsie. You can use an inexpensive electric nail drill on a very low speed to carefully file away the old glue.

    Once the backs are clean and smooth, wipe them down with a little rubbing alcohol to sanitize them. Store your beautiful, trendy press on nail designs in their original packaging or a dedicated clear acrylic organizer so they are ready for your next manicure day!

    Even with a powerhouse adhesive like the NYK1 Nail Bond Super Strong Nail Glue, the warm water and oil soak method will safely break down the bond when you are ready for a change. It is the perfect balance of a weeks-long hold and a damage-free, easy removal process.

    Ready to achieve your dream manicure at home? Grab a set of high quality press on nails, follow our foolproof prep steps, and show off your gorgeous hands! Don’t forget to save this post to your Pinterest nail boards for your next DIY mani day.

  • 5 Best Thermal Brushes for Short Hair (Perfect for Bixie Cuts!)

    5 Best Thermal Brushes for Short Hair (Perfect for Bixie Cuts!)

    Short hair is undeniably chic, but keeping those layers perfectly styled without spending hours in front of the mirror requires the right tools. Whether you are rocking a choppy bixie haircut or looking for low maintenance short haircuts, finding the best thermal brush for short hair will completely transform your morning routine. Let’s dive into the ultimate expert styling secrets and top tools that guarantee an effortless, salon-quality blowout at home.

    This article contains affiliate links. If you make a purchase through these links, we may earn a small commission at no extra cost to you.

    Why a Thermal Brush is a Short Hair Game Changer

    Ditching the Flat Iron Damage

    For years, women with short hair have relied on flat irons to tame their layers and flip their ends. However, clamping your delicate strands between two scorching hot plates every single day is a fast track to breakage and split ends. A thermal brush offers a much gentler alternative for daily styling.

    Instead of pressing the hair flat, a heated round brush glides through your strands, distributing heat evenly without the harsh tension. This means you can achieve that sleek, polished look while preserving your hair’s natural elasticity. If you want to maintain the health of your low maintenance short haircuts, making the switch is absolutely essential.

    Plus, flat irons often leave short hair looking stiff or “helmet-like.” The best thermal brush for short hair will give you that coveted, bouncy finish that looks professionally blown out. It is the ultimate secret to achieving soft, touchable texture.

    Achieving Root Volume Effortlessly

    One of the biggest struggles of having short hair is dealing with flat, lifeless roots. When your hair lacks length, gravity isn’t pulling it down, but it can still lay awkwardly flat against your scalp. This is where a high-quality thermal brush steps in to save the day.

    By placing the barrel of the brush directly at your root and lifting upward, you create instant, gravity-defying volume. The heated bristles work to set the hair at the base, giving you that lifted, airy look that lasts from morning until night. It is the perfect technique for styling a bixie haircut that needs a little extra oomph.

    Even better, you do not need to be a professional stylist to master this. The ergonomic design of modern hot brushes does all the heavy lifting for you. Just roll, lift, and watch your roots transform in seconds.

    Speeding Up Your Morning Routine

    Let’s be real: nobody wants to spend 45 minutes wrestling with a blow dryer and a traditional round brush at 7:00 AM. Juggling two tools while trying to style the back of your head is an exhausting arm workout. A thermal brush combines the styling power of a brush with the setting power of heat in one single tool.

    Because you are styling dry hair, you can quickly touch up your bedhead in less than ten minutes. Simply brush through your messy layers, add a little bend to the ends, and you are ready to walk out the door. It is the ultimate time-saving hack for busy women.

    When you have the best thermal brush short hair routines become incredibly streamlined. You get to sleep in longer while still showing up to work looking like you just stepped out of a high-end salon.

    Top 5 Best Thermal Brushes for Short Hair

    The Best Overall Thermal Brush for Layers

    When it comes to finding the ultimate all-rounder, you need a barrel size that is small enough to grab short layers but large enough to create sweeping volume. A 1.5-inch barrel is the golden standard for bobs, lobs, and longer pixies. It provides the perfect amount of tension to smooth frizz while adding a gorgeous curve to your ends.

    Our top expert pick for this category is the REVLON One-Step Root Booster Round Brush Dryer and Styler, 1.5 Inch. Priced at an incredibly reasonable $34.99 on Amazon, this brilliant tool boasts a stellar 4.4-star rating from thousands of happy users. It is specifically designed to get close to the root for maximum lift without burning your scalp.

    What makes this REVLON brush so special is its versatile airflow and ceramic coating, which protects hair from over-styling. Whether you are smoothing out a choppy bixie haircut for women or adding volume to a blunt bob, this brush delivers flawless results every single time.

    The Best Budget-Friendly Option

    You do not need to spend hundreds of dollars to get a salon-quality blowout at home. There are plenty of budget-friendly thermal brushes on the market that deliver incredible heat consistency and smoothing power. When shopping on a budget, look for brushes with tourmaline or ceramic barrels, as these materials naturally combat frizz.

    A great budget brush will still heat up quickly and offer dual-temperature settings. This ensures you can customize the heat to your specific hair type, keeping fine hair safe from scorching while providing enough heat to tame thick, coarse strands. Saving money doesn’t mean you have to compromise on your style!

    For those testing out the thermal brush trend for the first time, an affordable option is the perfect gateway. You will quickly see why the best thermal brush for short hair is a staple in every stylist’s toolkit.

    The Best Small-Barrel Brush for Super Short Pixies

    If you have a super short pixie cut or a heavily layered bixie, a standard 1.5-inch brush will simply be too large to grip your hair. You need a micro-barrel that can get right down to the nape of your neck and tightly wrap around your shortest pieces. A 3/4-inch barrel is the absolute sweet spot for these ultra-short styles.

    We highly recommend the PHOEBE Mini Curling Iron, 3/4 Inch Ceramic Tourmaline Barrel Dual Voltage Travel Curling Brush. Available on Amazon for just $24.99 with a fantastic 4.3-star rating, this compact powerhouse is a game-changer for short hair. The ceramic tourmaline barrel emits negative ions to eliminate frizz while locking in moisture.

    Because it is dual voltage, this PHOEBE mini brush is also the ultimate travel companion for your global adventures. It effortlessly grabs even the most stubborn baby hairs, making it the undeniable best thermal brush short hair users can buy for precision styling.

    The Best Premium Hot Brush for Thick Hair

    If you have thick, coarse, or unruly short hair, you might need a tool with a little more power and advanced heating technology. Premium thermal brushes often feature ionic generators that actively neutralize static and smooth the hair cuticle. This is crucial for preventing that dreaded triangular, poofy look that short, thick hair is prone to.

    Investing in a high-end brush usually means you get features like automatic shut-off, digital temperature displays, and snag-free silicone bristles. These small details make a massive difference in your daily routine. They glide through dense hair like butter, cutting your styling time in half.

    While the price tag may be higher, the longevity and performance of a premium tool are well worth the investment. It is the perfect way to ensure your choppy bixie haircut for women always looks intentionally styled.

    The Best Multi-Attachment Tool for Versatility

    Sometimes, a girl likes to switch up her look! If you are growing out a pixie or transitioning between low maintenance short haircuts, a multi-attachment thermal brush is incredibly handy. These tools come with interchangeable heads, allowing you to swap between a small curling barrel, a smoothing paddle brush, and a volumizing round brush.

    Having multiple attachments means your styling tool grows with your hair. You can use the smaller barrel for your bangs and the larger round brush for your longer crown layers. It is like having an entire salon’s worth of tools in one compact base.

    This versatility is especially helpful when styling a bixie haircut, which features varying lengths throughout the head. You can customize your blowout to perfectly suit every single layer.

    Styling a Bixie Haircut Like a Pro

    What is the Choppy Bixie Haircut?

    If you haven’t heard of the bixie yet, prepare to fall in love. The bixie is the perfect lovechild of a classic bob and a textured pixie cut. It offers the length and face-framing elegance of a bob, combined with the piecey, short layers of a pixie.

    A choppy bixie haircut for women is incredibly flattering because it can be customized to suit any face shape. The choppy layers add modern edge and movement, preventing the cut from looking too round or dated. It is the ultimate “cool girl” hairstyle that exudes confidence.

    Because of its highly textured nature, the bixie relies heavily on proper styling to look its best. Without the right technique, those gorgeous layers can fall flat. That is exactly why using the best thermal brush for short hair is non-negotiable for this look.

    Prepping Your Hair for Heat

    Great style always starts in the shower. To get the most out of your thermal brush, you need to prep your hair with a lightweight, volumizing shampoo and conditioner. Avoid heavy moisturizing masks on styling days, as they can weigh your short layers down and make them look greasy.

    Once your hair is washed, rough-dry it with a standard blow dryer until it is 100% dry. Thermal brushes are designed to be used on dry hair to set the style and add volume. Using a hot brush on wet hair can cause severe heat damage and bubbling of the hair cuticle.

    Before any heat touches your strands, you must apply a high-quality heat protectant. Look for a fine mist spray rather than a heavy serum, as short hair gets weighed down very easily. Brush the protectant through your hair to ensure every strand is coated and safe.

    Step-by-Step Bixie Blowout Routine

    Ready to achieve salon perfection? Start by sectioning your hair. Even though your hair is short, clipping the top half up allows you to focus on the underneath layers first. This ensures you do not miss any hidden pieces at the nape of your neck.

    • Step 1: Take a small section of hair from the bottom layer. Place your thermal brush at the root and hold it there for 3 seconds to build volume.
    • Step 2: Slowly glide the brush down the hair shaft. As you reach the ends, gently roll the brush inward to create a soft, face-framing curve.
    • Step 3: Drop the top section of your hair. For the crown, over-direct the hair by pulling it straight up toward the ceiling as you brush. This creates massive, bouncy volume.
    • Step 4: For your bangs or front pieces, brush them forward and slightly under. Then, sweep them to your preferred side while they are still warm to set the swoop.

    Finish by running your fingers through the layers to break up the perfection. The choppy bixie haircut for women looks best when it is a little lived-in and messy. Your best thermal brush short hair routine is now complete!

    Must-Have Products for Choppy Bixie Haircuts for Women

    Heat Protectants That Don’t Weigh Hair Down

    As mentioned earlier, heat protectant is the golden rule of hair care. However, short hair requires a very specific type of formula. Heavy oils and thick creams will instantly collapse the volume you just worked so hard to build.

    Look for aerosol heat protectant sprays or ultra-lightweight milks. These formulas distribute a micro-fine mist over your layers, providing a protective barrier up to 450 degrees without leaving a sticky residue. They are completely invisible once applied.

    Always hold the spray at least six inches away from your head to ensure an even application. Give the product a minute to dry completely before going in with your thermal brush to avoid any sizzling sounds!

    Texturizing Sprays for That Piecey Look

    Once your hair is styled with your thermal brush, it might look a little *too* perfect and fluffy. To get that edgy, modern vibe, you need a dry texturizing spray. This magical product is a hybrid between dry shampoo and light-hold hairspray.

    Flipping your head upside down and spraying a texturizer into the roots gives your hair an instant, gritty lift. It separates your choppy layers, making each piece stand out beautifully. It is the absolute secret weapon for styling a bixie haircut.

    Texturizing spray also helps absorb excess oils throughout the day. This keeps your short hair looking fresh and voluminous, even in humid weather.

    Lightweight Styling Creams for Flyaways

    To finish your look, you need a product that adds definition and tames pesky flyaways without making your hair look crunchy. A high-quality styling paste or taffy is exactly what your short hair routine is missing. It allows you to sculpt and define your ends with total precision.

    We absolutely love the Kenra Platinum Texturizing Taffy 13 | Sculpting & Defining Paste | Medium Hold | All Hair Types. Retailing for $24 on Amazon and boasting a massive 4.6-star rating, this product is a holy grail for short hair styling. It provides a pliable, medium hold that lets you mold your hair exactly how you want it.

    Just warm a pea-sized amount of the Kenra Taffy between your fingertips and gently pinch the ends of your layers. It creates that beautiful, piecey texture that makes the choppy bixie haircut for women so iconic, all while keeping frizz completely under control.

    Low Maintenance Short Haircuts You Can Style in 5 Minutes

    The Classic French Bob

    If you love the idea of short hair but want something effortlessly chic, the French bob is calling your name. Cut right at the jawline and typically paired with soft, brow-grazing bangs, this cut is the epitome of Parisian glamour. It is designed to look slightly undone and natural.

    The beauty of the French bob is that it thrives on your hair’s natural texture. You only need your thermal brush to quickly smooth out the bangs and flip the ends slightly under. It is one of the most elegant low maintenance short haircuts available today.

    Because it requires so little styling, the French bob is perfect for busy professionals. You can literally roll out of bed, do a quick five-minute touch-up, and look incredibly put-together.

    The Textured Pixie Cut

    For those who want to go super short, a textured pixie cut is bold, beautiful, and incredibly easy to manage. Unlike a traditional, sleek pixie, a textured pixie features longer, choppy layers on top and closely cropped sides. This contrast creates a striking, modern silhouette.

    Styling a textured pixie is all about creating height at the crown. Using the best thermal brush for short hair, simply lift the top pieces upward and backward. The whole process takes less than three minutes.

    Finish with a bit of styling wax to define the spiky texture. It is a fierce, low-maintenance look that highlights your cheekbones and jawline beautifully.

    The Shaggy Bixie

    The shaggy bixie takes the classic bixie cut and adds a rock-and-roll twist. It incorporates heavily razored layers and face-framing curtain bangs, giving it a very 70s-inspired, retro feel. This cut is all about maximum movement and volume.

    Because the layers are so heavily textured, the shaggy bixie practically styles itself. You just need a quick pass with your thermal brush to give the crown some lift and kick the ends outward. It embraces imperfections, making it a stress-free daily style.

    If you are searching for low maintenance short haircuts that still make a massive fashion statement, the shaggy bixie is your perfect match.

    Expert Tips to Make Your Thermal Brush Style Last All Day

    The Cool Shot Secret for Setting Volume

    Here is a salon secret that will change your life: heat styles the hair, but cold *sets* the hair. When you use a thermal brush, the heat breaks down the hydrogen bonds in your hair, allowing you to mold it into a new shape. However, if the hair cools down while laying flat, it will lose that shape.

    To lock in your volume, leave the thermal brush at your root for a few seconds, then remove it and immediately hit that section with the “cool shot” button on your blow dryer. Alternatively, just hold the hair up with your fingers for

  • 7 Best At Home Gel Kits for Flawless Nails (Wait Until #4!)

    7 Best At Home Gel Kits for Flawless Nails (Wait Until #4!)

    Why You Need to Switch to DIY Gel Nails

    Tired of dropping $80 at the salon every two weeks? Achieving a flawless, chip-free manicure from your couch is easier than ever with the best at home gel kit.

    This article contains affiliate links. If you make a purchase through these links, we may earn a small commission at no extra cost to you.

    Let’s dive into everything you need to become your own nail tech, from seamless extensions to trendy chrome finishes! Whether you are a total beginner or an aspiring nail artist, finding the best at home gel kit will completely revolutionize your beauty routine.

    Get ready to save massive amounts of money while unleashing your inner creativity. By the end of this guide, you will be creating Pinterest-worthy, salon-quality nails in your pajamas!

    Calculating the Savings vs. Salon Visits

    Let’s be real, keeping up with bi-weekly salon appointments takes a massive toll on your bank account. The average gel manicure costs around $40 to $60, and that is before you add on tips or custom nail art.

    When you invest in the best at home gel kit, you are essentially paying for months of manicures upfront! Even a high-end, luxury starter kit costs less than a single visit to your local nail tech.

    Let’s do the quick math on your potential savings:

    • Salon Manicures: $50 per visit x 2 visits a month = $1,200 a year!
    • DIY Man
  • Hello world!

    Welcome to WordPress. This is your first post. Edit or delete it, then start writing!